Beginner-friendly rocks & minerals
A curated starter set: 344 rocks and minerals that are common, durable enough to survive a beginner's hardness test, and safe to handle without special precautions. Each one shows up often enough on real rockhounding trips that you have a real chance of finding it yourself.
Filtered to: common rarity, Mohs hardness 3 or higher, has at least one reference photo, and not flagged as radioactive or toxic.
Four habits that separate confident IDs from guesses
- Step 1Start with hardness
A pocket scratch kit (a copper coin, a steel knife, a piece of quartz) sorts most specimens into the right hardness band within seconds. Almost every misidentification a new rockhound makes comes from skipping this step.
- Step 2Take a streak
Drag the specimen across the back of a white ceramic tile. Streak color is often more diagnostic than the rock's surface color, especially for iron-bearing minerals.
- Step 3Look at luster, not color
Color lies. Luster — how light reflects off a fresh surface — is far more reliable. Metallic, glassy, pearly, dull: each rules in or out whole categories.
- Step 4Match against known references
Compare every find to a confirmed reference specimen, ideally with a photo. The encyclopedia entries on this site each show what a clean specimen should look like.
The starter set
Each entry has a field-ID guide, look-alike comparisons, and where it is mapped in the U.S.
 Adulariacommonmineral · Mohs 6colorless, white, pale yellow
 Aegirinecommonmineral · Mohs 6green, dark green, black
 Agatecommonmineral · Mohs 6.5-7white, gray, blue
 Agatized Picture Woodcommonfossil · Mohs 6.5-7brown, tan, black
 Agatized Woodcommonfossil · Mohs 6.5-7brown, red, yellow
 Albitecommonmineral · Mohs 6-6.5white, colorless, gray
 Almandinecommonmineral · Mohs 7-7.5dark red, reddish-brown, brownish-black
 Almanditecommonmineral · Mohs 7-7.5dark red, brownish red, violet red
 Amazonitecommonmineral · Mohs 6bright green, blue-green, teal
 Amber Quartzcommonmineral · Mohs 7yellow, orange, brownish-yellow
 Amethystcommongemstone · Mohs 7purple, violet, lavender
 Amethyst Geodecommonmineral · Mohs 7purple, violet
 Ammonitescommonfossil · Mohs 3-4brown, gray, black
 Amphibolitecommonmetamorphic · Mohs 5-6black, dark green, dark gray
 Amygdaloidal Basaltcommonigneous · Mohs 5-6gray, black, green
 Analcimecommonmineral · Mohs 5-5.5colorless, white, gray
 Analcitecommonmineral · Mohs 5-5.5white, colorless, gray
 Andalusitecommonmineral · Mohs 7.5reddish-brown, brown, pink
 Andesinecommonmineral · Mohs 6-6.5white, gray, greenish
 Andesitecommonigneous · Mohs 6-7gray, dark gray, brownish-gray
 Andraditecommonmineral · Mohs 6.5-7.5black, brown, green
 Angelitecommonmineral · Mohs 3.5blue, grayish-blue, white
 Anhydritecommonmineral · Mohs 3.5colorless, white, gray
 Ankeritecommonmineral · Mohs 3.5-4white, yellow, brown
 Anorthositecommonigneous · Mohs 6white, gray, bluish-gray
 Apache Tearscommonmineral · Mohs 5-5.5black, dark brown
 Apatitecommonmineral · Mohs 5green, blue, yellow
 Apophyllitecommonmineral · Mohs 4.5-5white, colorless, green
 Aragonitecommonmineral · Mohs 3.5-4white, colorless, yellow
 Arizona Ruby Garnetcommongemstone · Mohs 7-7.5red, deep red
 Arkosecommonsedimentary · Mohs 6-7pink, gray, tan
 Augen Gneisscommonmetamorphic · Mohs 5-7gray, pink, white
 Augitecommonmineral · Mohs 5.5-6black, dark green, brownish green
 Australitecommonmineral · Mohs 5-6black, dark brown, olive green
 Aventurinecommongemstone · Mohs 6.5-7green, red, brown
 Baculitecommonfossil · Mohs 3-4brown, gray, beige
 Banded Iron Formationcommonsedimentary · Mohs 5-7red, gray, black
 Baritecommonmineral · Mohs 3-3.5colorless, white, yellow
 Barite Rosescommonmineral · Mohs 3-3.5brown, reddish-brown, tan
 Barytecommonmineral · Mohs 3-3.5white, colorless, yellow
 Basaltcommonigneous · Mohs 6black, dark gray, dark green
 Belemnitecommonfossil · Mohs 3-4brown, black, gray
 Berylcommonmineral · Mohs 7.5-8colorless, green, blue
 Biggs Jaspercommonmineral · Mohs 6.5-7tan, brown, cream
 Bison Skullcommonfossil · Mohs 3-5white, brown, tan
 Bivalve Fossilcommonfossil · Mohs 3-5tan, brown, gray
 Black Chertcommonmineral · Mohs 6.5-7black, dark gray
 Black Flintcommonmineral · Mohs 7black, dark gray
 Black Tourmalinecommonmineral · Mohs 7-7.5black, brownish-black
 Blastoidcommonfossilgray, brown, white
 Bloodstonecommonmineral · Mohs 6.5-7green, red
 Blue Berylcommongemstone · Mohs 7.5-8blue, blue-green, light blue
 Blue Lace Agatecommonmineral · Mohs 6.5-7blue, white
 Blue Moonstonecommongemstone · Mohs 6-6.5blue, white, colorless
 Blue Sapphirecommongemstone · Mohs 9blue, violet-blue, greenish-blue
 Blue Topazcommongemstone · Mohs 8blue, sky blue, swiss blue
 Blueschistcommonmetamorphicblue, bluish-gray, blue-green
 Boji Stonescommonmineral · Mohs 3.5-4brown, gray, black
 Botswana Agatecommonmineral · Mohs 6.5-7gray, white, brown
 Brachiopodcommonfossilgray, brown, white
 Brazilian Agatecommonmineral · Mohs 6.5-7gray, white, brown
 Brazilian Geodecommonmineral · Mohs 7purple, white, clear
 Brecciacommonsedimentary · Mohs 3-7gray, brown, red
 Brecciated Jaspercommonmineral · Mohs 6.5-7red, brown, yellow
 Brown Tourmalinecommonmineral · Mohs 7-7.5brown, dark brown, yellowish-brown
 Bryozoancommonfossil · Mohs 3-5white, gray, tan
 Calaminecommonmineral · Mohs 4.5-5white, colorless, blue
 Calcitecommonmineral · Mohs 3white, colorless, yellow
 Calcite Onyxcommonmineral · Mohs 3white, brown, tan
 Calymenecommonfossilgray, brown, tan
 Cantera Opalcommongemstone · Mohs 5.5-6.5orange, red, yellow
 Cape May Diamondcommonmineral · Mohs 7colorless
 Carneliancommonmineral · Mohs 6.5-7red, red-orange, brownish-red
 Cassiteritecommonmineral · Mohs 6-7black, brown, reddish-brown
 Cave Pearlscommonmineral · Mohs 3white, cream, gray
 Celestinecommonmineral · Mohs 3-3.5colorless, white, pale blue
 Celestitecommonmineral · Mohs 3-3.5colorless, white, pale blue
 Chabazitecommonmineral · Mohs 4-5white, colorless, pink
 Chalcedonycommonmineral · Mohs 6.5-7white, gray, blue
 Charlevoix Stonecommonfossil · Mohs 3-4gray, white, beige
 Charnockitecommonigneous · Mohs 6-7gray, greenish, brown
 Chertcommonmineral · Mohs 6.5-7white, gray, brown
 Chert Nodulescommonmineral · Mohs 6.5-7gray, brown, black
 Chevron Amethystcommongemstone · Mohs 7purple, white, violet
 Chiastolitecommonmineral · Mohs 6.5-7.5gray, yellowish-brown, reddish-brown
 Chondritecommonigneous · Mohs 5-6gray, brown, black
 Chromitecommonmineral · Mohs 5.5black, brownish-black
 Chrysolitecommonmineral · Mohs 6.5-7yellow-green, olive-green, emerald-green
 Citrinecommongemstone · Mohs 7yellow, golden-yellow, amber
 Citrine Geodecommongemstone · Mohs 7yellow, orange, brownish-yellow
 Clear Quartzcommonmineral · Mohs 7colorless, white
 Common Opalcommonmineral · Mohs 5.5-6.5white, gray, yellow
 Concretioncommonsedimentary · Mohs 3-7brown, gray, tan
 Concretions With Fossilscommonfossil · Mohs 3-5brown, gray, tan
 Condor Agatecommonmineral · Mohs 6.5-7red, orange, yellow
 Coquinacommonsedimentary · Mohs 3tan, white, light gray
 Coral Fossilcommonfossil · Mohs 6.5-7white, tan, brown
 Cordieritecommonmineral · Mohs 7-7.5blue, violet, gray
 Corundumcommonmineral · Mohs 9colorless, red, blue
 Crazy Lace Agatecommonmineral · Mohs 6.5-7white, gray, yellow
 Crinoid Stemscommonfossil · Mohs 3-4gray, white, tan
 Crinoidal Limestonecommonsedimentary · Mohs 3gray, tan, white
 Crinoidscommonfossil · Mohs 3-4gray, white, tan
 Crocodile Toothcommonfossil · Mohs 3-5brown, tan, black
 Dark Gray Flintcommonmineral · Mohs 6.5-7dark gray, black, brown
 Datolitecommonmineral · Mohs 5-5.5white, colorless, yellow
 Dendritic Agatecommonmineral · Mohs 6.5-7white, colorless, gray
 Dendritic Opalcommonmineral · Mohs 5.5-6.5white, cream, colorless
 Desert Rose Baritecommonmineral · Mohs 3-3.5tan, brown, cream
 Diabasecommonigneous · Mohs 6-7dark gray, black, greenish-gray
 Diamondcommongemstone · Mohs 10colorless, yellow, brown
 Dinosaur Bonescommonfossil · Mohs 5.5-7brown, red, black
 Dinosaur Toothcommonfossil · Mohs 3-5brown, black, gray
 Diopsidecommonmineral · Mohs 5.5-6.5white, gray, green
 Dioritecommonigneous · Mohs 6-7gray, black, white
 Dolostonecommonsedimentary · Mohs 3.5-4gray, white, buff
 Dravitecommonmineral · Mohs 7-7.5brown, dark brown, yellowish brown
 Dumortierite Quartzcommonmineral · Mohs 7blue, violet-blue, deep blue
 Dunitecommonigneous · Mohs 6.5-7yellow-green, olive-green, dark green
 Echinoidcommonfossil · Mohs 3-4white, gray, tan
 Eclogitecommonmetamorphicgreen, red
 Elbaitecommonmineral · Mohs 7-7.5green, pink, blue
 Elrathiacommonfossilbrown, gray, black
 Enstatitecommonmineral · Mohs 5-6green, brown, gray
 Epidotecommonmineral · Mohs 6-7pistachio green, yellowish-green, dark green
 Eye Agatecommonmineral · Mohs 6.5-7white, gray, brown
 Fairy Stonecommonmineral · Mohs 7-7.5brown, reddish-brown, black
 Fern Fossilcommonfossilblack, brown, gray
 Fish Fossilcommonfossil · Mohs 3-5brown, tan, gray
 Flintcommonmineral · Mohs 7gray, black, brown
 Flint Nodulescommonmineral · Mohs 7gray, black, brown
 Fluoritecommonmineral · Mohs 4purple, blue, green
 Forsteritecommonmineral · Mohs 6.5-7green, yellow-green, colorless
 Fossilized Fernscommonfossil · Mohs 3-6black, brown, gray
 Fossilized Shark Teethcommonfossil · Mohs 3-5black, gray, brown
 Fossilized Shellscommonfossil · Mohs 3-5white, gray, brown
 Fossilized Woodcommonfossil · Mohs 6.5-7brown, red, yellow
 Gabbrocommonigneous · Mohs 6-7black, dark green, dark gray
 Garnet Schistcommonmetamorphic · Mohs 3-7gray, brown, silver
 Gastropod Fossilcommonfossilbrown, gray, white
 Geodecommonsedimentary · Mohs 7white, gray, brown
 Glaucophanecommonmineral · Mohs 6blue, blue-gray, lavender
 Gneisscommonmetamorphic · Mohs 5-7white, gray, pink
 Goethitecommonmineral · Mohs 5-5.5yellowish-brown, reddish-brown, black
 Gold Sulfidescommonmineral · Mohs 6-6.5pale brass-yellow
 Goniatitecommonfossil · Mohs 3-4brown, gray, black
 Goshenitecommongemstone · Mohs 7.5-8colorless, white
 Granitecommonigneous · Mohs 6-7white, gray, pink
 Granodioritecommonigneous · Mohs 6-7gray, white, black
 Green Tourmalinecommongemstone · Mohs 7-7.5green, yellow-green, blue-green
 Greenschistcommonmetamorphic · Mohs 3-6green, dark green, light green
 Greywackecommonsedimentary · Mohs 6-7gray, dark gray, brownish gray
 Grossularcommonmineral · Mohs 6.5-7.5green, brown, yellow
 Grossularite Garnetcommonmineral · Mohs 6.5-7.5green, yellow, brown
 Hawk's Eyecommonmineral · Mohs 7blue, blue-gray, blue-green
 Hematitecommonmineral · Mohs 5.5-6.5steel-gray, black, reddish-brown
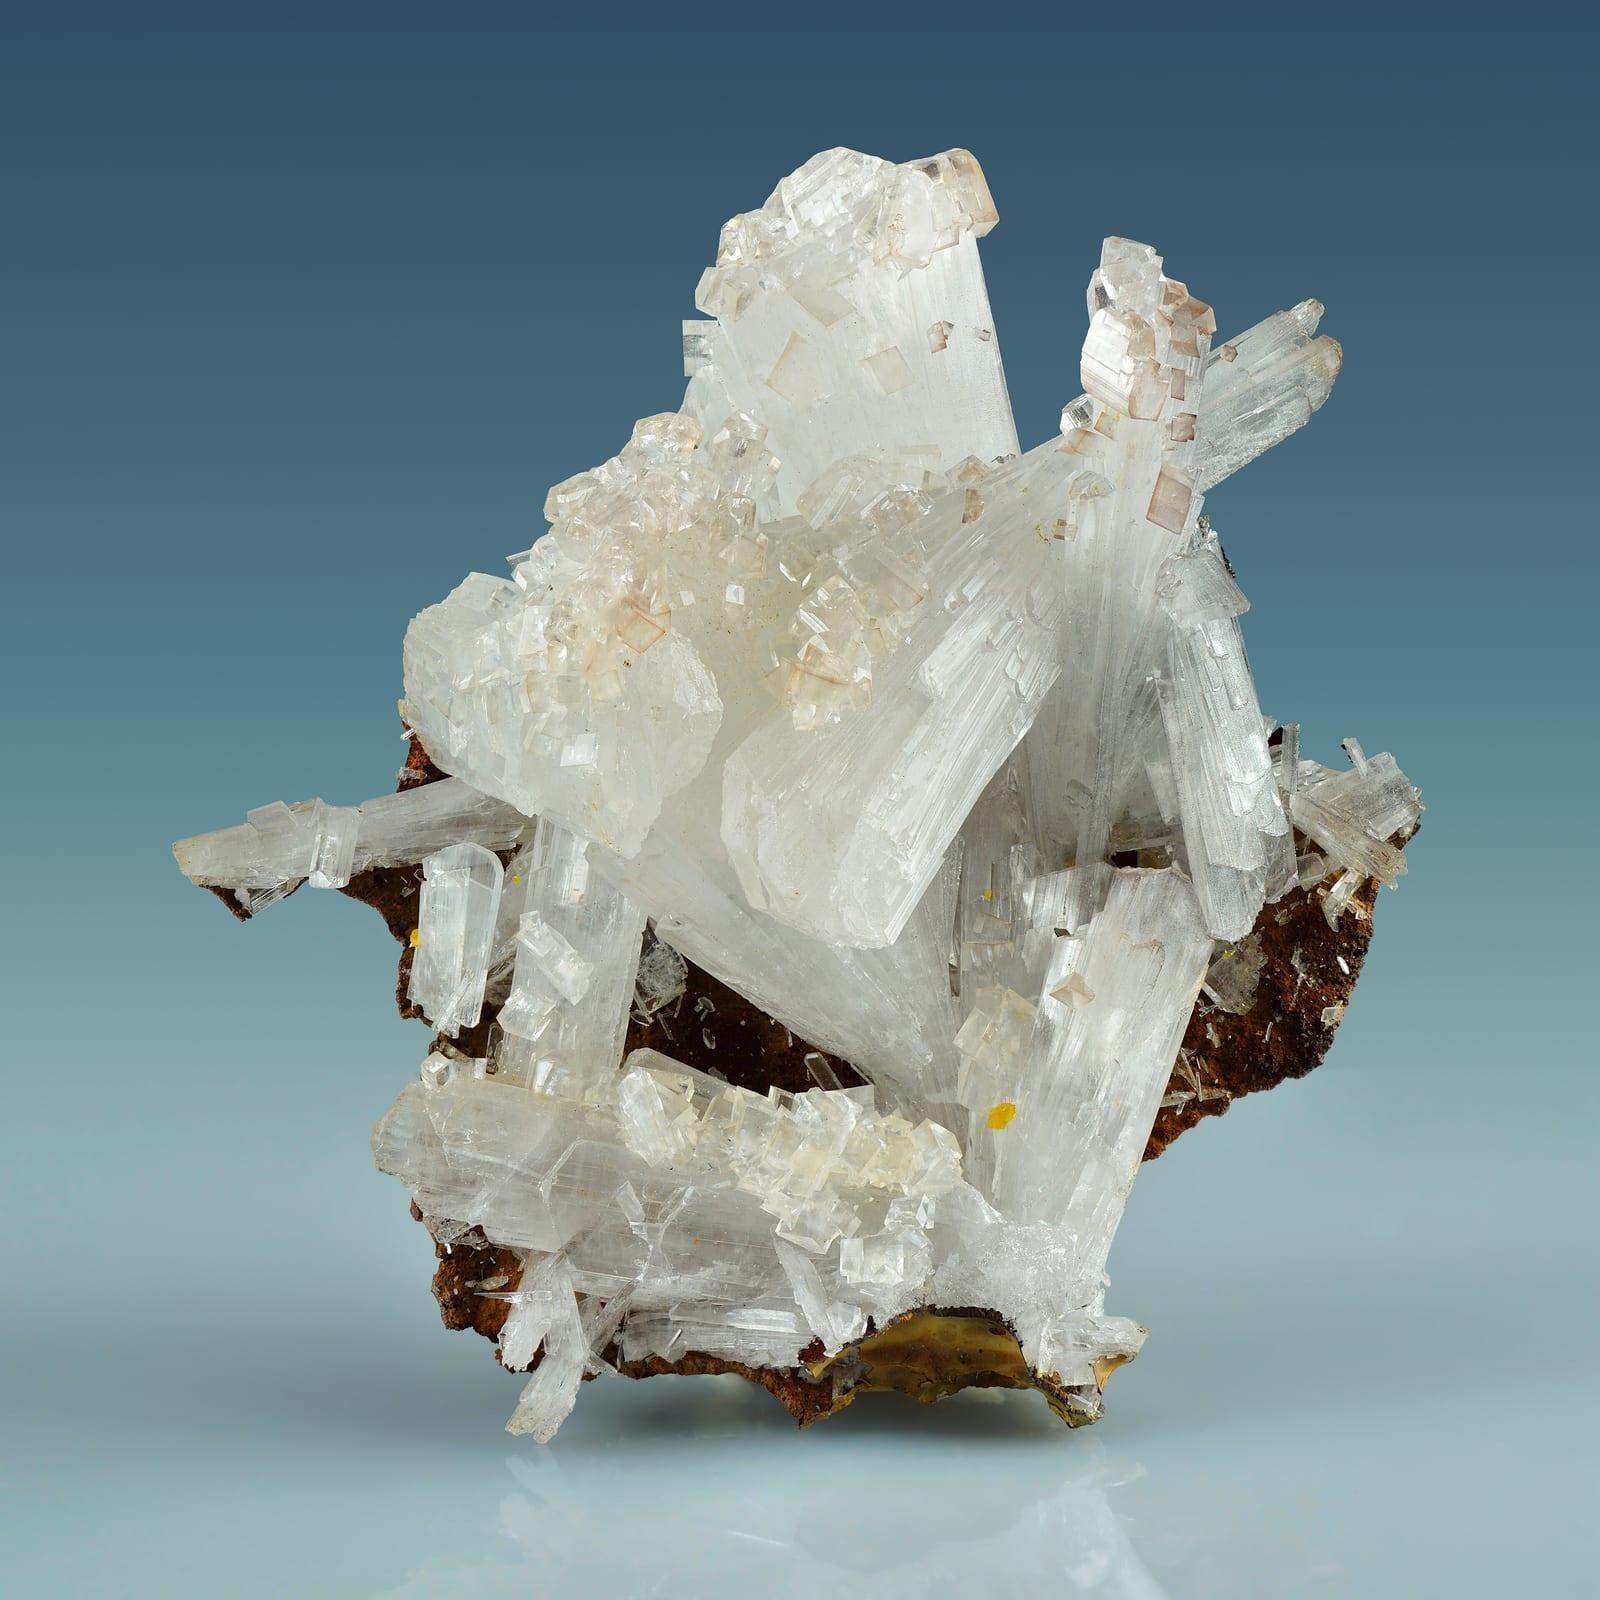 Hemimorphitecommonmineral · Mohs 4.5-5colorless, white, blue
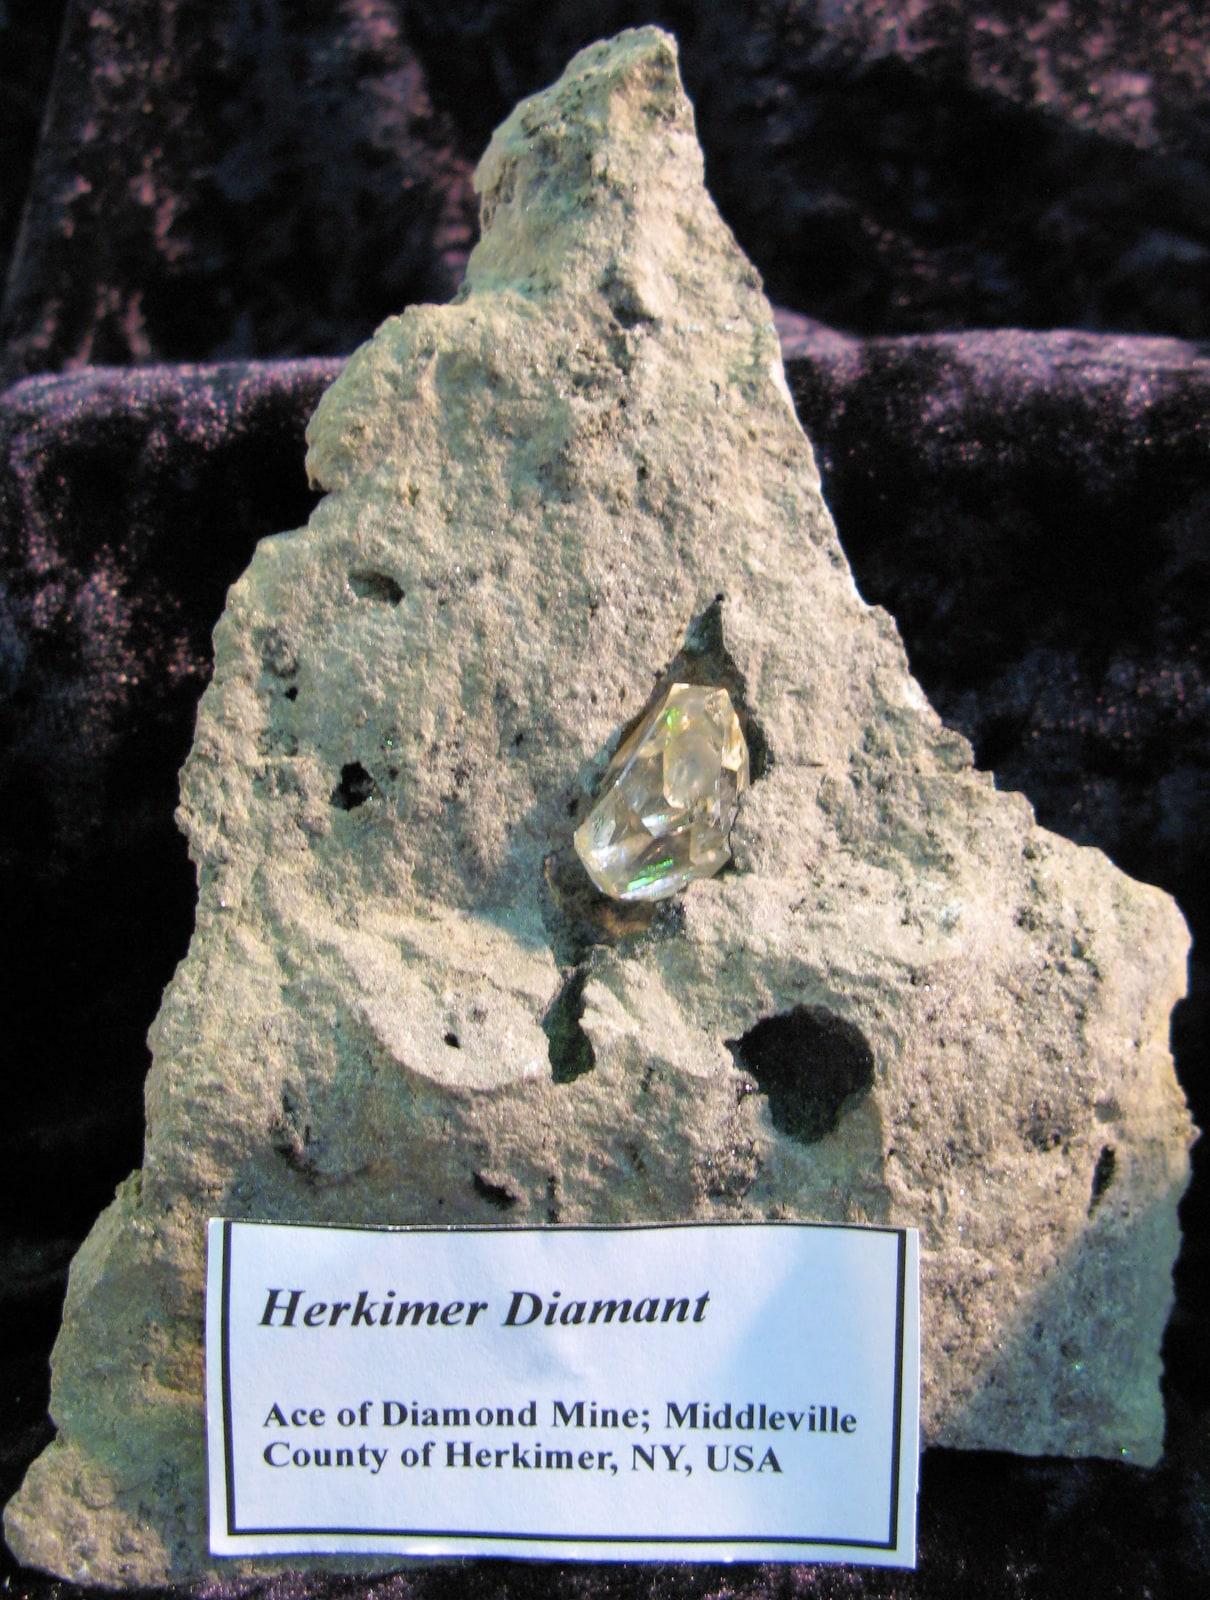 Herkimer Diamondcommonmineral · Mohs 7colorless, smoky
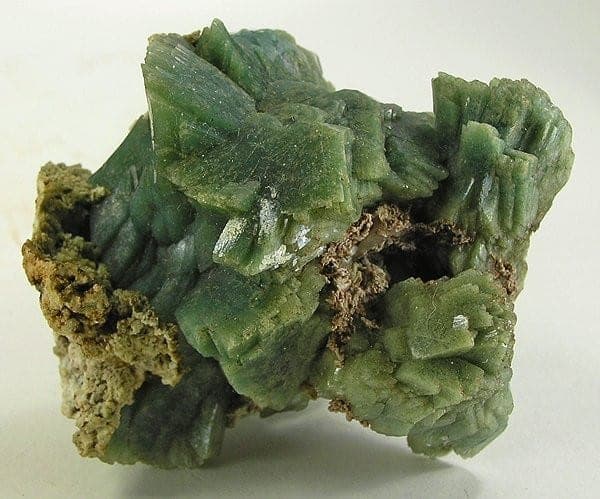 Heulanditecommonmineral · Mohs 3.5-4white, colorless, yellow
 Honey Calcitecommonmineral · Mohs 3yellow, honey-yellow, amber
 Horn Coralcommonfossil · Mohs 3-4gray, tan, brown
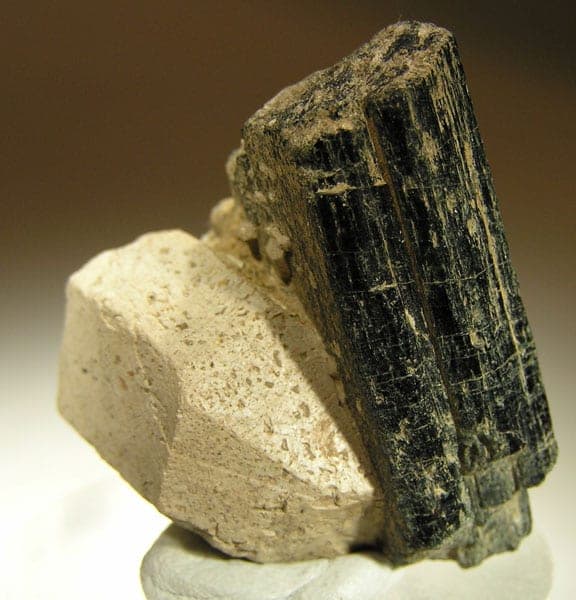 Hornblendecommonmineral · Mohs 5-6black, dark green, brownish-green
 Hornfelscommonmetamorphic · Mohs 5-7gray, dark gray, black
 Horsetail Fossilcommonfossil · Mohs 3-5gray, brown, black
 Hyalitecommonmineral · Mohs 5.5-6.5colorless, white, yellowish
 Hypersthenecommonmineral · Mohs 5-6black, dark brown, dark green
 Idocrasecommonmineral · Mohs 6.5green, brown, yellow
 Ignimbritecommonigneous · Mohs 5-7gray, white, pink
 Ilmenitecommonmineral · Mohs 5-6black, iron-black, brownish-black
 Indochinitecommonmineral · Mohs 5.5-6.5black, brown
 Iron Orecommonmineral · Mohs 5-6.5red, black, brown
 Jadecommonmineral · Mohs 6-7green, white, lavender
 Jaspercommonmineral · Mohs 6.5-7red, yellow, brown
 Kambaba Jaspercommonfossil · Mohs 6.5-7green, black
 Keokuk Geodecommonmineral · Mohs 7clear, white, gray
 Keweenaw Agatecommonmineral · Mohs 6.5-7red, orange, white
 Kingman Turquoisecommonmineral · Mohs 5-6blue, green, blue-green
 Knightiacommonfossiltan, brown, gray
 Kyanitecommonmineral · Mohs 4.5-7blue, colorless, white
 Labradoritecommonmineral · Mohs 6-6.5gray, gray-green, blue
 Lake Superior Agatecommonmineral · Mohs 6.5-7red, orange, yellow
 Lapis Lazulicommonmineral · Mohs 5-5.5blue, deep blue, ultramarine
 Larvikitecommonigneous · Mohs 6gray, blue, black
 Las Choyas Coconut Geodecommonmineral · Mohs 7white, clear, purple
 Laumontitecommonmineral · Mohs 4white, colorless, yellow
 Leucitecommonmineral · Mohs 5.5-6white, gray, colorless
 Limestonecommonsedimentary · Mohs 3white, gray, tan
 Limonitecommonmineral · Mohs 4-5.5yellow, brown, reddish-brown
 London Blue Topazcommongemstone · Mohs 8dark blue, blue
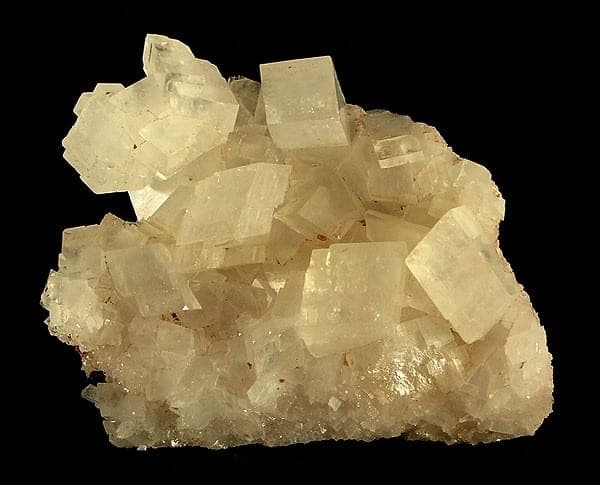 Magnesitecommonmineral · Mohs 3.5-4.5white, gray, yellow
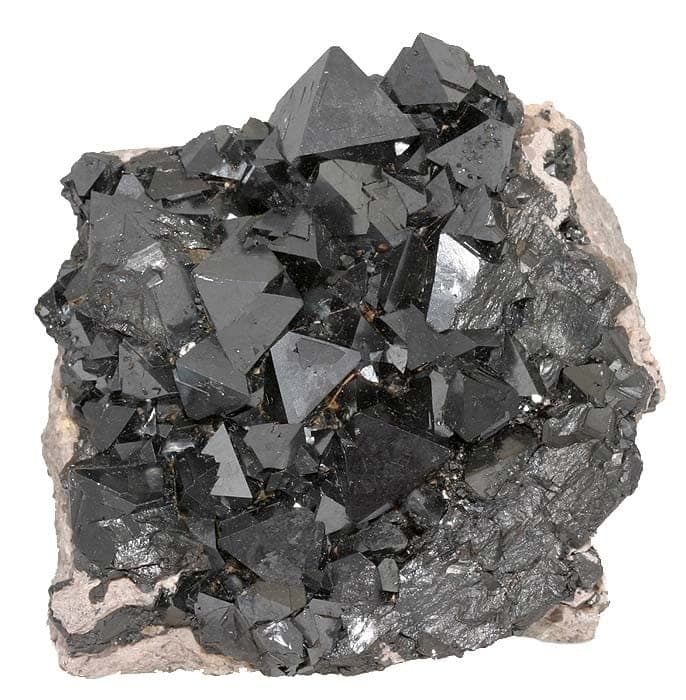 Magnetitecommonmineral · Mohs 5.5-6.5black, iron-black
 Mahogany Obsidiancommonmineral · Mohs 5-6red-brown, black
 Manganitecommonmineral · Mohs 4dark gray, black, steel-gray
 Mangano Calcitecommonmineral · Mohs 3pink, pale pink, peach
 Marblecommonmetamorphic · Mohs 3-4white, gray, black
 Marcasitecommonmineral · Mohs 6-6.5pale brass-yellow, tin-white, gray
 Mary Ellen Jaspercommonfossil · Mohs 6.5-7red, brown, black
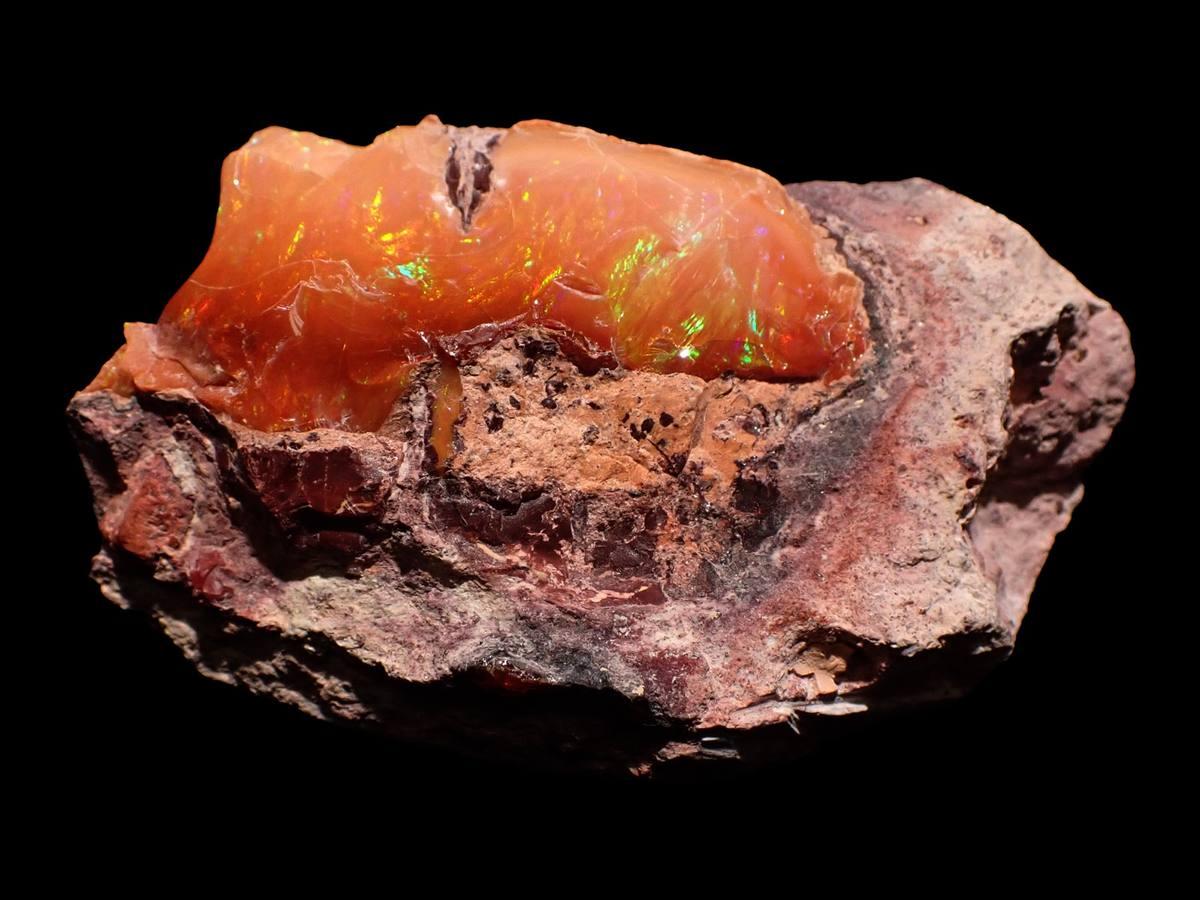 Matrix Opalcommongemstone · Mohs 5.5-6.5multicolored, brown, black
 Megalodon Toothcommonfossil · Mohs 3-5black, gray, brown
 Mexican Lace Agatecommonmineral · Mohs 6.5-7white, red, orange
 Mexican Onyxcommonmineral · Mohs 3white, yellow, brown
 Mica Schistcommonmetamorphic · Mohs 3-6silver, gray, black
 Microclinecommonmineral · Mohs 6white, gray, yellow
 Migmatitecommonmetamorphic · Mohs 5-7black, white, gray
 Milky Quartzcommonmineral · Mohs 7white, milky white
 Montana Moss Agatecommonmineral · Mohs 6.5-7clear, white, gray
 Mookaitecommonmineral · Mohs 6.5-7red, yellow, cream
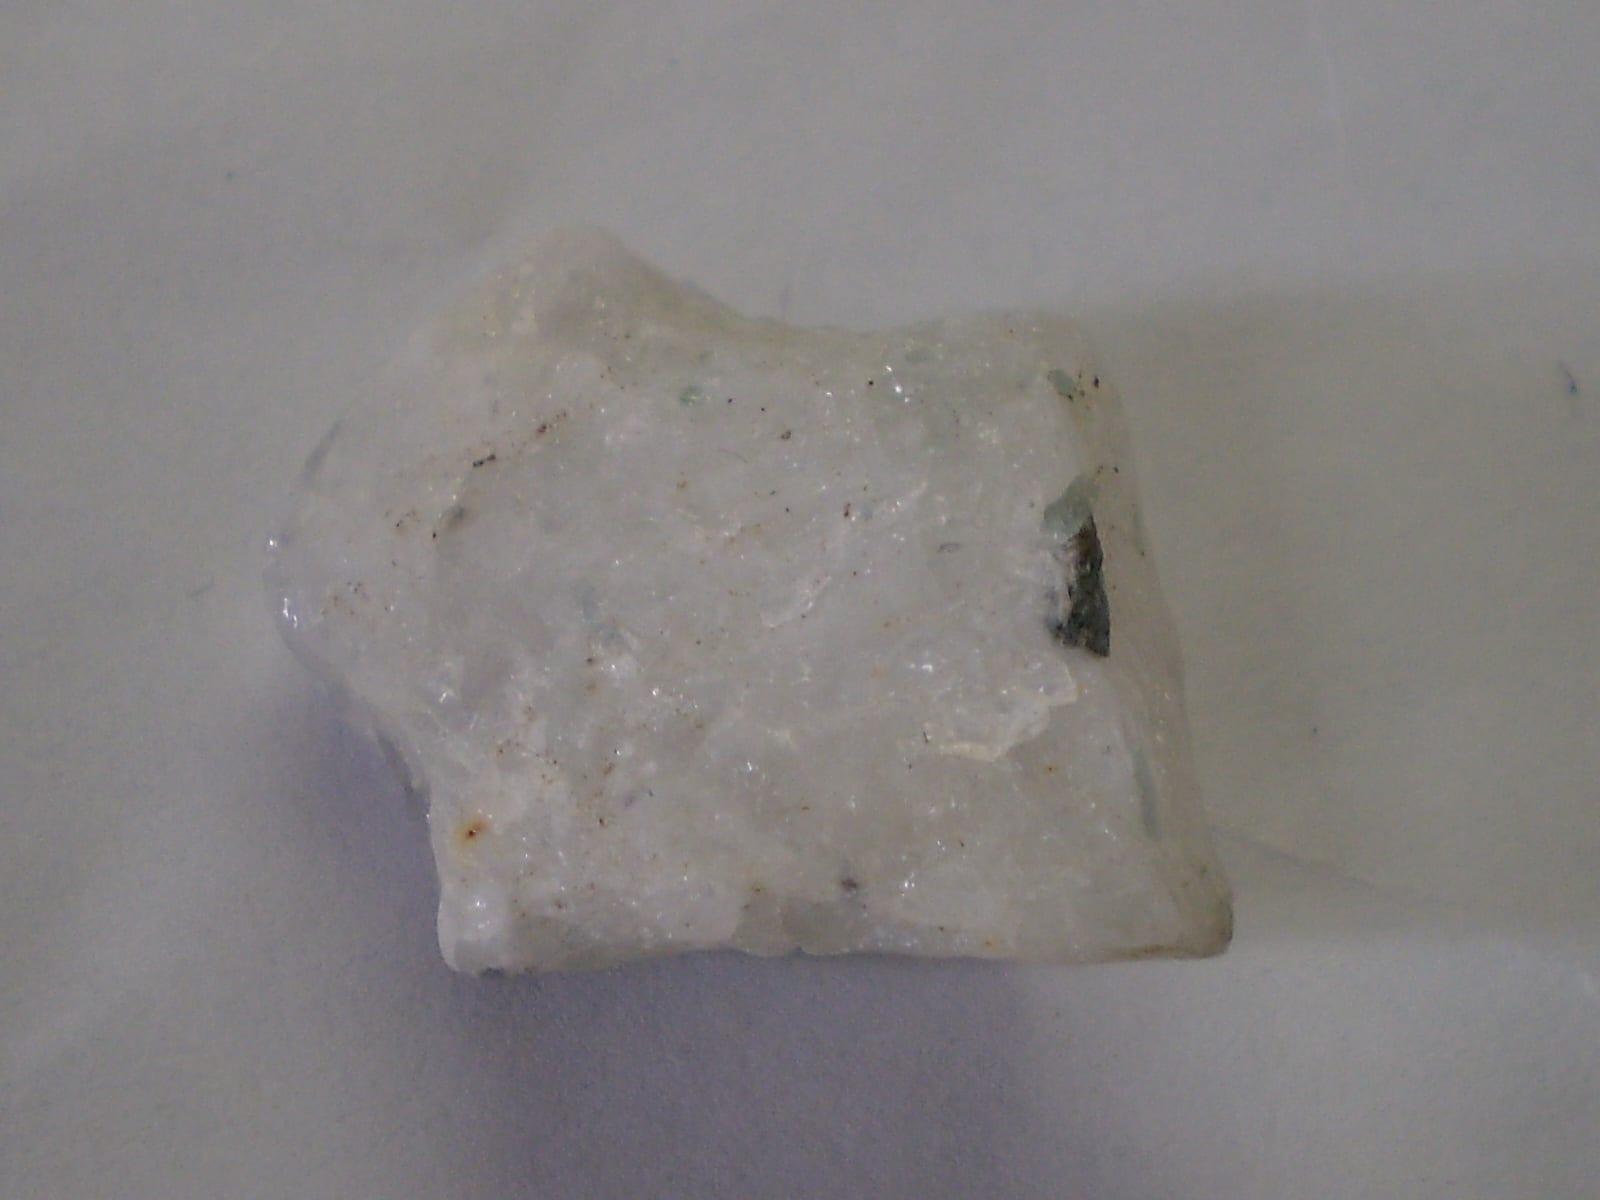 Moonstonecommongemstone · Mohs 6white, colorless, blue
 Moqui Marblescommonmineral · Mohs 5.5-6.5brown, reddish-brown, black
 Morrisonitecommonmineral · Mohs 6.5-7pink, tan, orange
 Mosasaur Toothcommonfossil · Mohs 3-5black, brown, tan
 Moss Agatecommonmineral · Mohs 6.5-7white, green, brown
 Mylonitecommonmetamorphic · Mohs 5-7gray, black, white
 Natrolitecommonmineral · Mohs 5-5.5white, colorless, gray
 Nautiloidcommonfossilbrown, gray, white
 Nephelinecommonmineral · Mohs 5.5-6white, gray, yellowish
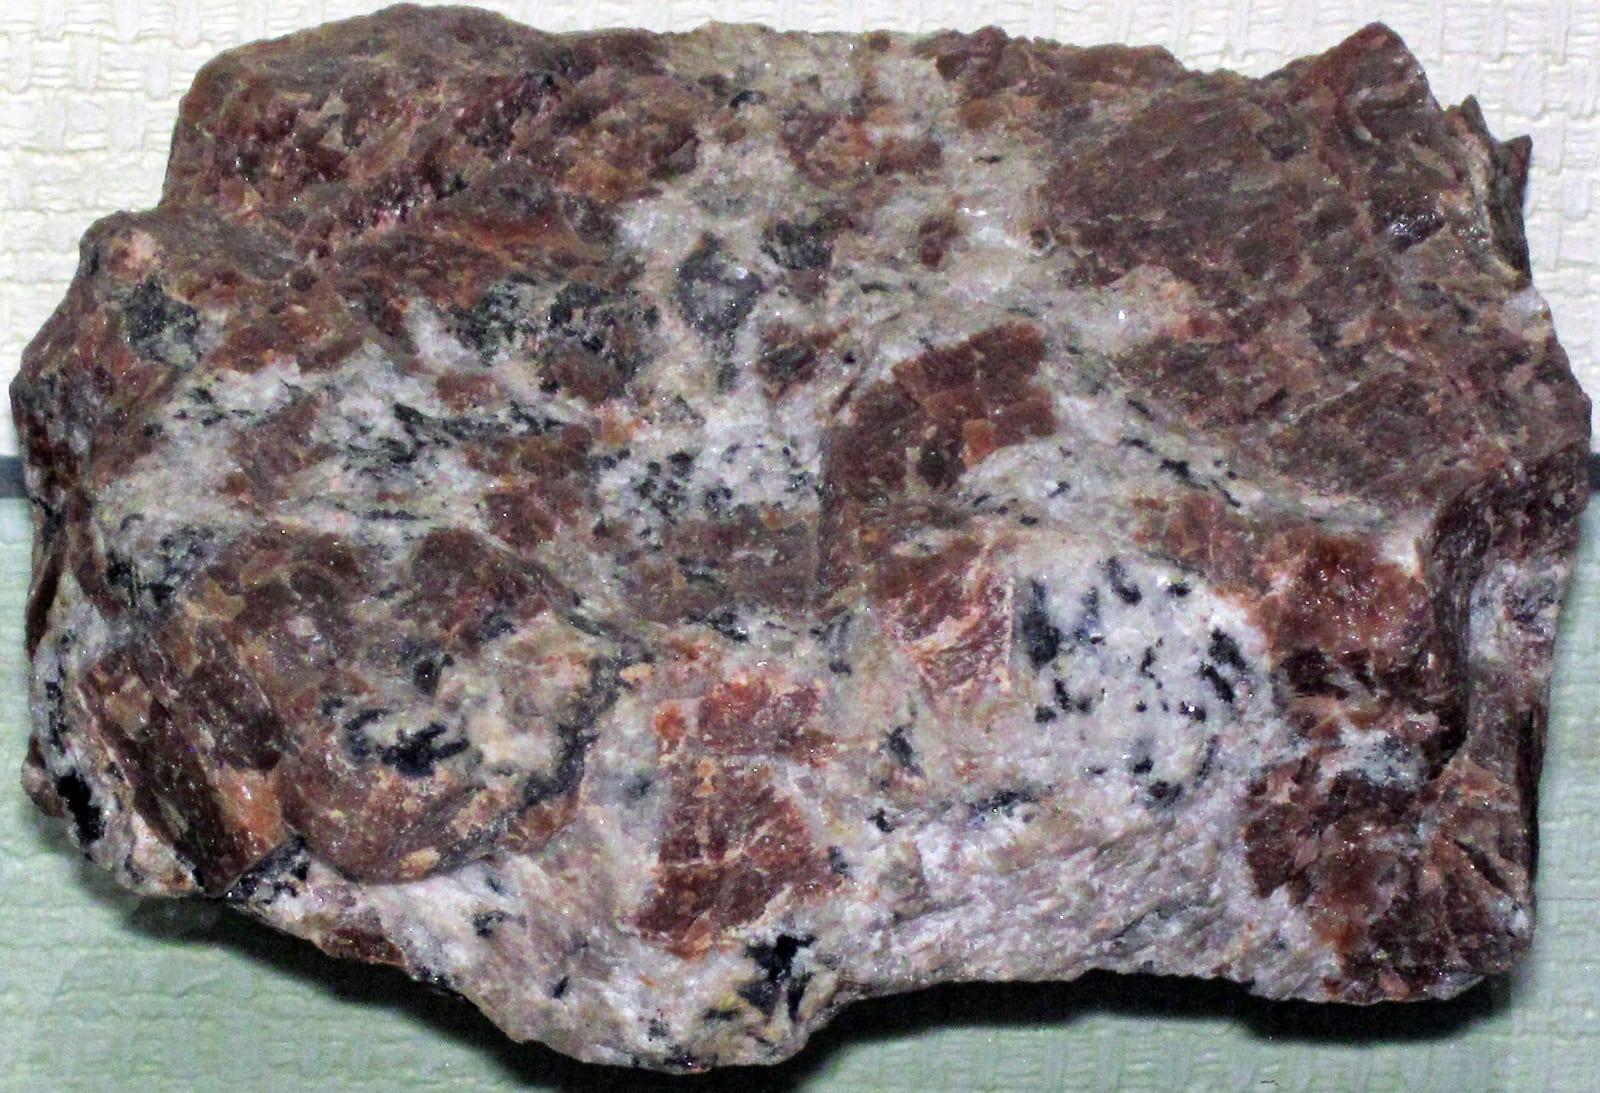 Nepheline Syenitecommonigneous · Mohs 5.5-6gray, white, pink
 Nephritecommonmineral · Mohs 6-6.5green, white, yellow
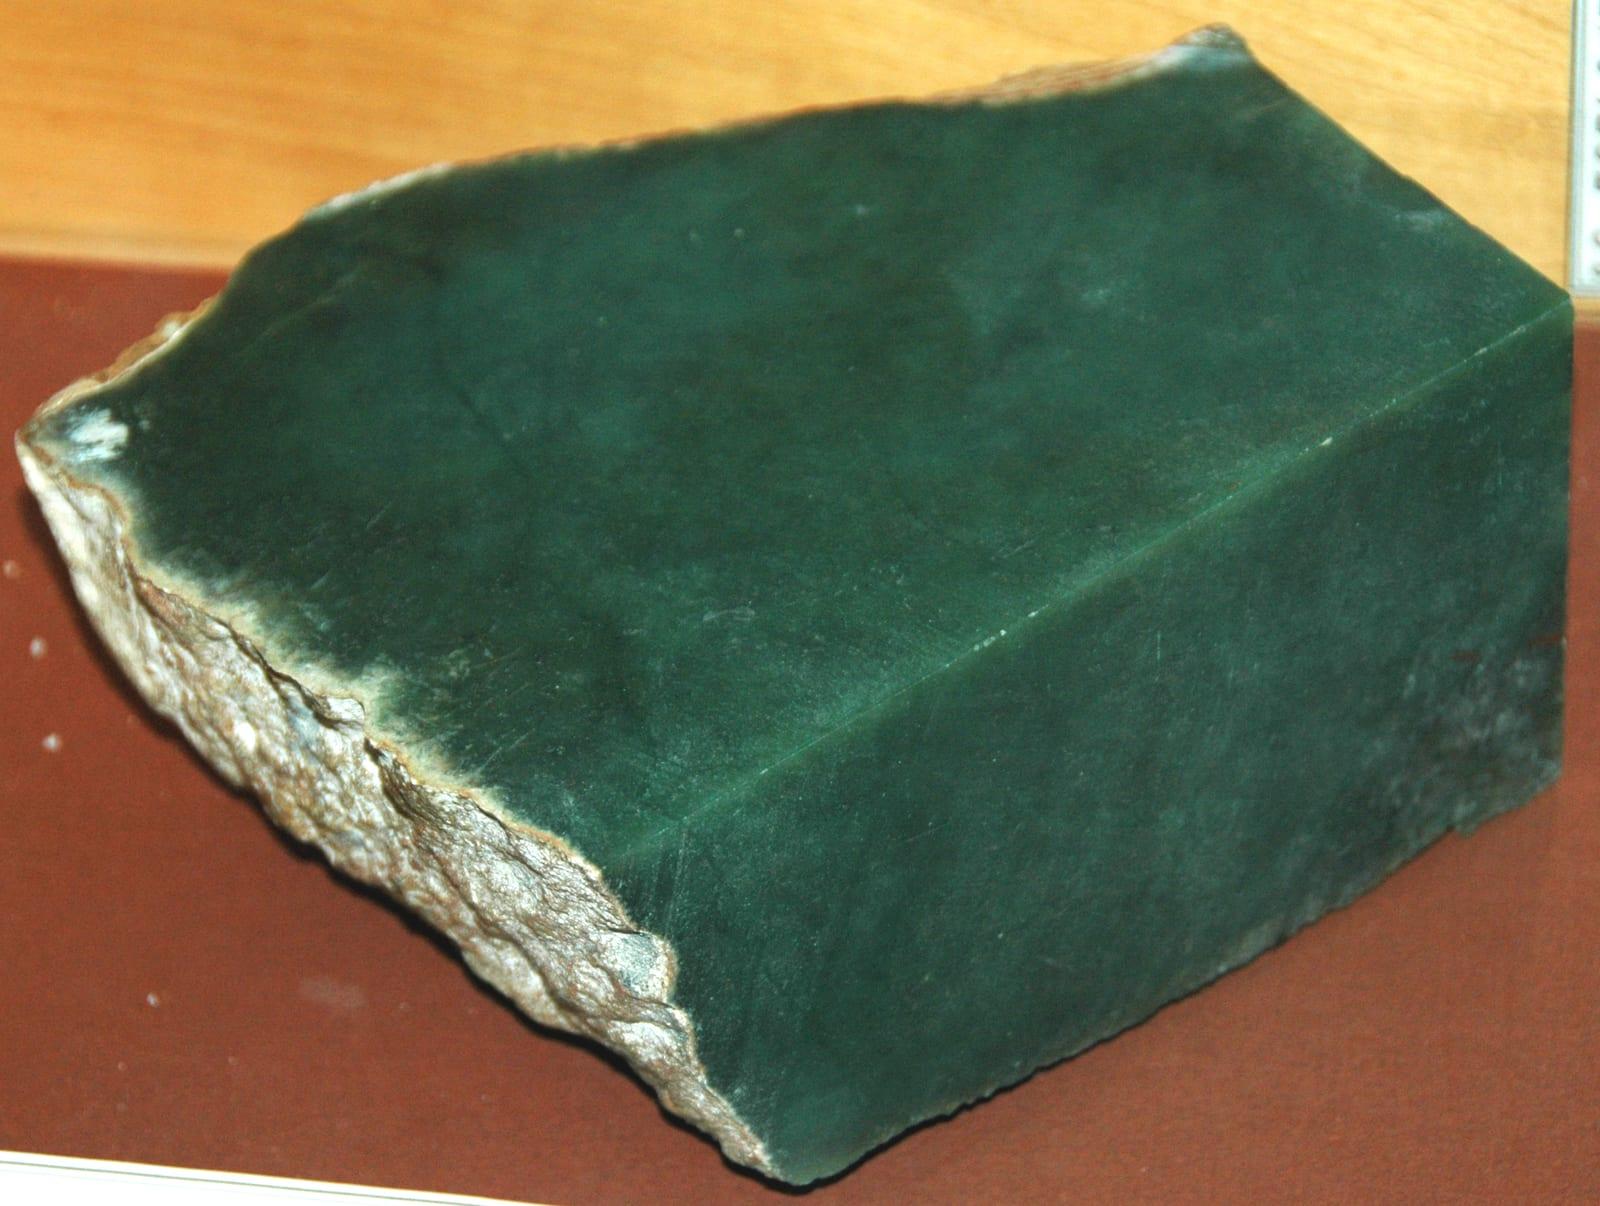 Nephrite Jadecommonmineral · Mohs 6-6.5green, white, yellow
 Obsidiancommonigneous · Mohs 5-6black, dark green, mahogany
 Obsidian Nodulescommonmineral · Mohs 5-5.5black, brown, gray
 Octahedral Fluoritecommonmineral · Mohs 4purple, blue, green
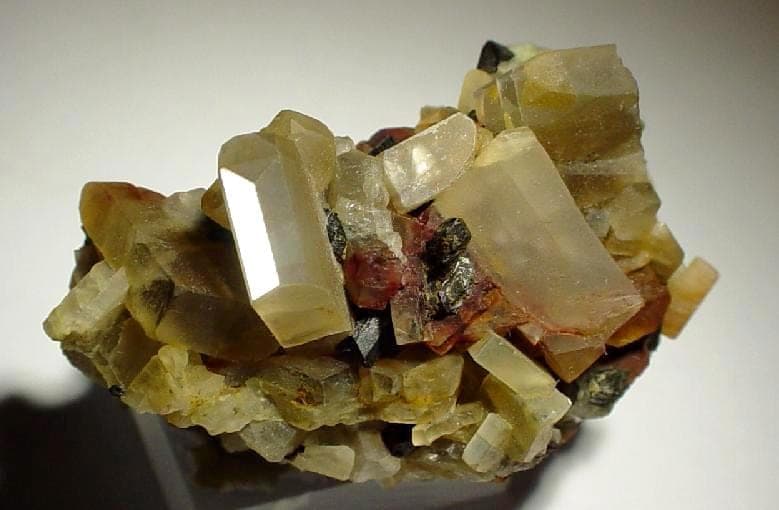 Oligoclasecommonmineral · Mohs 6-6.5white, colorless, gray
 Olivinecommonmineral · Mohs 6.5-7olive green, yellow-green, brownish green
 Onyxcommonmineral · Mohs 6.5-7black, white, banded
 Oolitic Limestonecommonsedimentary · Mohs 3white, tan, gray
 Opalcommonmineral · Mohs 5.5-6.5white, black, colorless
 Opalitecommonmineral · Mohs 5.5-6.5white, blue, milky
 Opalized Woodcommonfossil · Mohs 5.5-6.5brown, red, yellow
 Optical Calcitecommonmineral · Mohs 3colorless, white
 Orbicular Jaspercommonmineral · Mohs 6.5-7green, yellow, brown
 Orthocerascommonfossil · Mohs 3-4black, brown, gray
 Orthoclasecommonmineral · Mohs 6white, colorless, flesh-red
 Owyhee Jaspercommonmineral · Mohs 6.5-7blue, brown, cream
 Owyhee Thundereggcommonmineral · Mohs 6.5-7blue, purple, white
 Pegmatitecommonigneous · Mohs 6-7white, gray, pink
 Pentlanditecommonmineral · Mohs 3.5-4bronze-yellow, brownish-yellow
 Peridotcommongemstone · Mohs 6.5-7olive-green, yellow-green, lime-green
 Peridotitecommonigneous · Mohs 6-7dark green, olive green, yellow-green
 Perthitecommonmineral · Mohs 6white, gray, pink
 Petoskey Stonescommonfossil · Mohs 3-4gray, brown, tan
 Petrified Algaecommonfossil · Mohs 6.5-7tan, brown, gray
 Petrified Palmcommonfossil · Mohs 6.5-7brown, tan, black
 Petrified Woodcommonfossil · Mohs 6.5-7brown, red, yellow
 Phacopscommonfossil · Mohs 3-5brown, gray, black
 Phantom Quartzcommonmineral · Mohs 7colorless, white, gray
 Philippinitecommonmineral · Mohs 5.5-6.5black, dark brown
 Phillipsitecommonmineral · Mohs 4-5white, colorless, yellow
 Picture Jaspercommonmineral · Mohs 6.5-7brown, tan, cream
 Pink Feldsparcommonmineral · Mohs 6pink, salmon, flesh-colored
 Pink Opalcommonmineral · Mohs 5.5-6.5pink, rose-pink
 Plagioclasecommonmineral · Mohs 6-6.5white, gray, colorless
 Plant Fossilcommonfossilbrown, black, gray
 Plume Agatecommonmineral · Mohs 6.5-7white, gray, brown
 Poppy Jaspercommonmineral · Mohs 6.5-7red, yellow, brown
 Prairie Agatecommonmineral · Mohs 6.5-7yellow, brown, orange
 Prehnitecommonmineral · Mohs 6-6.5green, yellow-green, white
 Priday Plume Agatecommonmineral · Mohs 6.5-7red, pink, white
 Priday Thundereggcommonfossil · Mohs 6.5-7red, brown, white
 Psilomelanecommonmineral · Mohs 5-6black, bluish-black, gray
 Puddingstonecommonsedimentarymulticolored, gray, red
 Pumicecommonigneous · Mohs 5.5-6white, gray, cream
 Pyritecommonmineral · Mohs 6-6.5brass-yellow, pale-gold
 Pyrolusitecommonmineral · Mohs 6-6.5black, bluish-black, dark gray
 Pyropecommonmineral · Mohs 7-7.5red, purplish-red, orangey-red
 Pyroxenitecommonigneous · Mohs 5-7dark green, brown, black
 Pyrrhotitecommonmineral · Mohs 3.5-4.5bronze, brown, red-brown
 Quartzcommonmineral · Mohs 7colorless, white, gray
 Quartzitecommonmetamorphic · Mohs 7white, gray, pink
 Rainbow Moonstonecommongemstone · Mohs 6-6.5white, colorless, blue
 Rainbow Obsidiancommonmineral · Mohs 5-5.5black, iridescent
 Red Jaspercommonmineral · Mohs 6.5-7red, red-brown, brick red
 Red Sandstonecommonsedimentary · Mohs 6-7red, red-brown, rust
 Rhodolitecommongemstone · Mohs 7-7.5pink, red, purple
 Rhodonitecommonmineral · Mohs 5.5-6.5pink, reddish-pink, brown
 Rhyolitecommonigneous · Mohs 6-7gray, pink, tan
 Romanèchitecommonmineral · Mohs 5-6black, gray
 Rose Quartzcommongemstone · Mohs 7pink, rose-red
 Rose Rockscommonmineral · Mohs 3-3.5reddish-brown, red, tan
 Rugose Coralcommonfossil · Mohs 3-4white, gray, brown
 Rutilated Quartzcommongemstone · Mohs 7clear, white, smoky
 Rutilecommonmineral · Mohs 6-6.5reddish-brown, red, black
 Sagenite Agatecommonmineral · Mohs 6.5-7clear, white, yellow
 Sand Dollar Fossilcommonfossil · Mohs 3white, tan, gray
 Sandstonecommonsedimentary · Mohs 6-7tan, brown, yellow
 Sanidinecommonmineral · Mohs 6colorless, white, gray
 Sapphirecommongemstone · Mohs 9blue, yellow, pink
 Sardcommonmineral · Mohs 6.5-7brownish-red, reddish-brown, orange-brown
 Scapolitecommonmineral · Mohs 5.5-6colorless, white, gray
 Schistcommonmetamorphic · Mohs 3-6silver, gray, black
 Schorlcommonmineral · Mohs 7-7.5black
 Scolecitecommonmineral · Mohs 5-5.5white, colorless, pink
 Scoriacommonigneous · Mohs 5-6black, dark gray, reddish brown
 Sea Urchin Fossilcommonfossil · Mohs 3-5white, gray, tan
 Septarian Nodulescommonsedimentary · Mohs 3-5brown, yellow, gray
 Sheen Obsidiancommonmineral · Mohs 5-6black, gold, silver
 Sideritecommonmineral · Mohs 3.5-4yellow, brown, gray
 Silicified Algaecommonfossil · Mohs 6.5-7tan, brown, gray
 Silicified Fernscommonfossil · Mohs 6.5-7brown, black, gray
 Silicified Lignitecommonfossil · Mohs 6.5-7brown, black, gray
 Silicified Woodcommonfossil · Mohs 6.5-7brown, red, yellow
 Silkstonecommonmineral · Mohs 7white, gray, yellow
 Sillimanitecommonmineral · Mohs 6.5-7.5white, colorless, gray
 Siltstonecommonsedimentary · Mohs 3-4gray, red, brown
 Skarncommonmetamorphic · Mohs 5-7green, brown, black
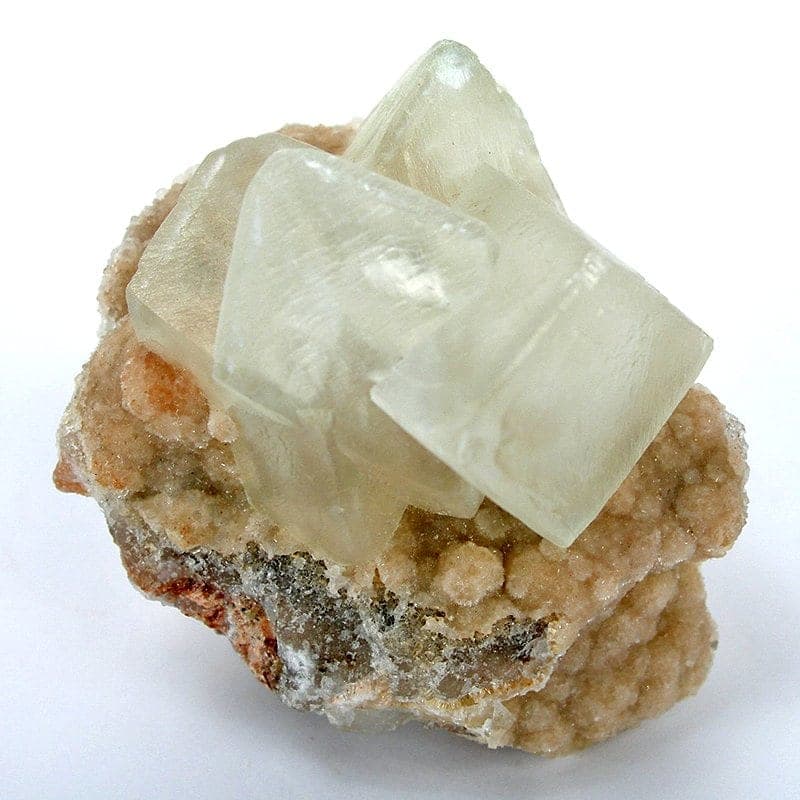 Smithsonitecommonmineral · Mohs 4-4.5white, gray, green
 Smoky Quartzcommonmineral · Mohs 7brown, gray, black
 Snakeskin Agatecommonmineral · Mohs 6.5-7white, gray, tan
 Snowflake Obsidiancommonmineral · Mohs 5-5.5black, white
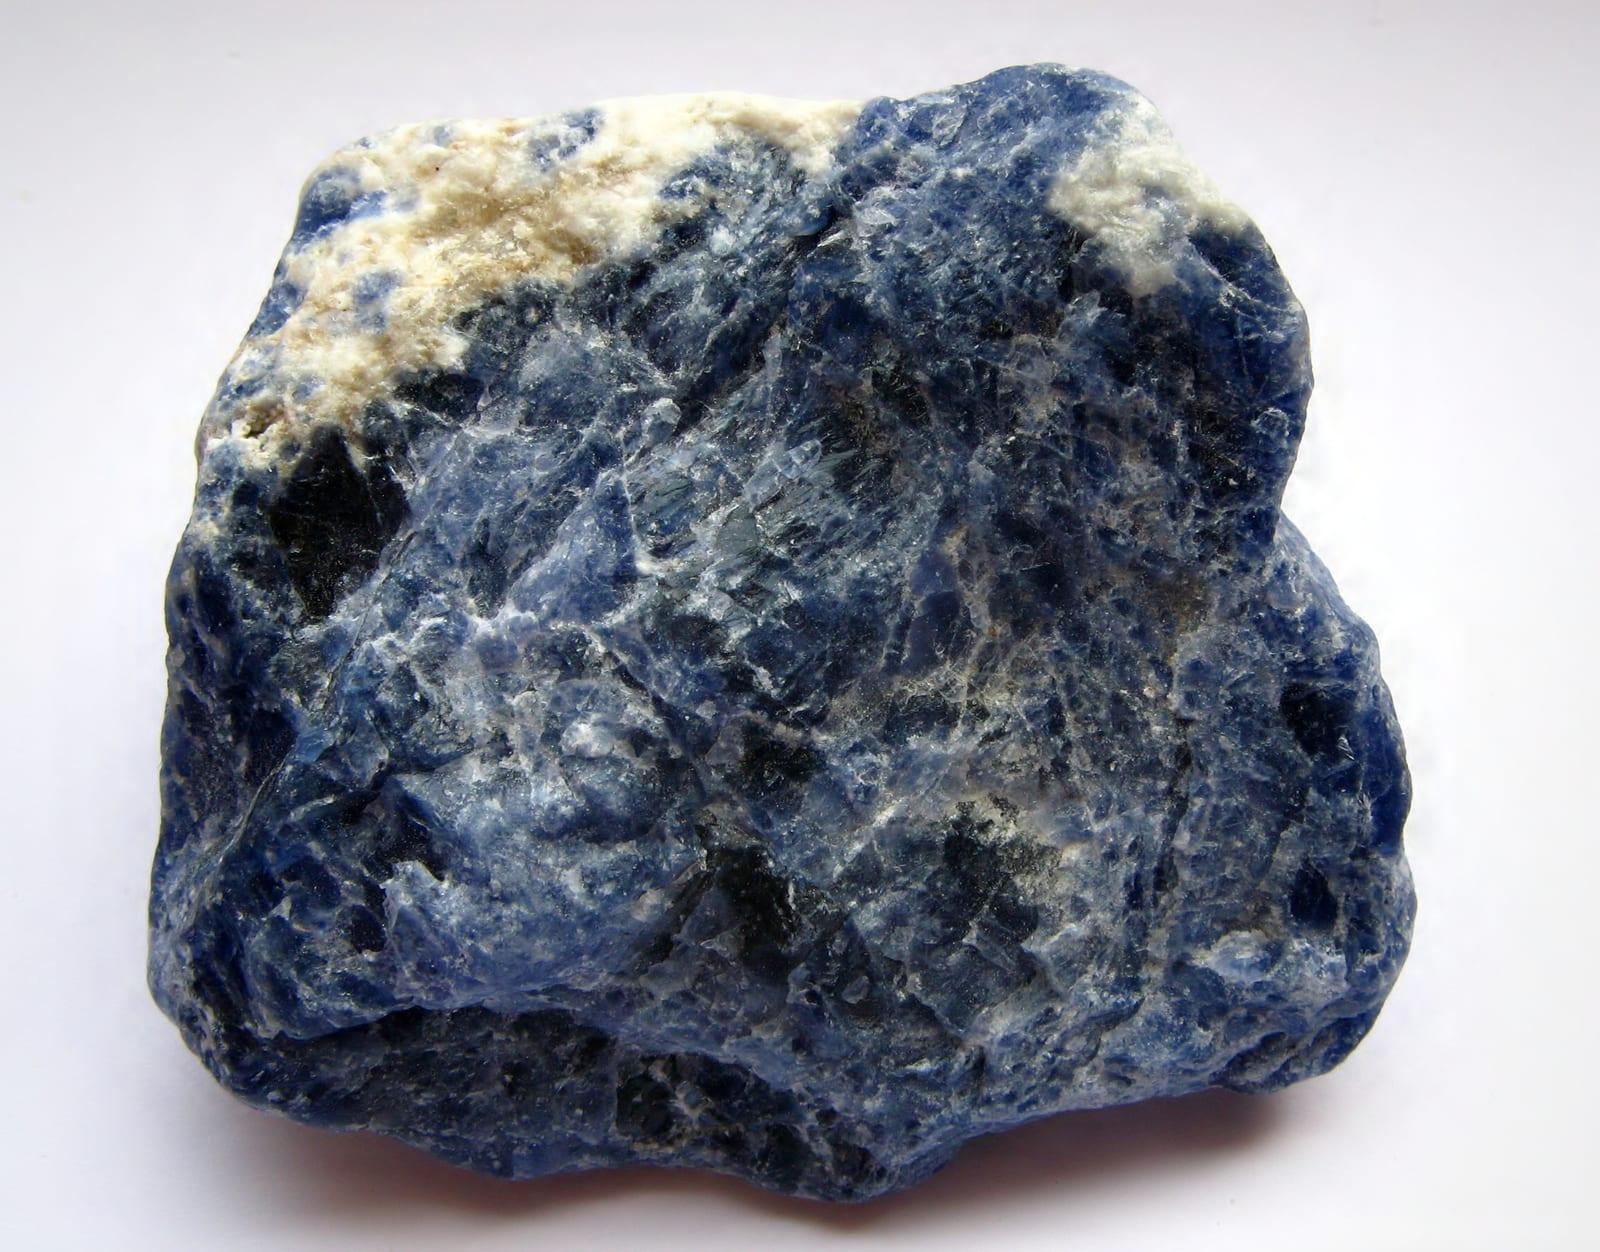 Sodalitecommonmineral · Mohs 5.5-6blue, white, gray
 Specularitecommonmineral · Mohs 5.5-6.5steel-gray, iron-black, silvery-gray
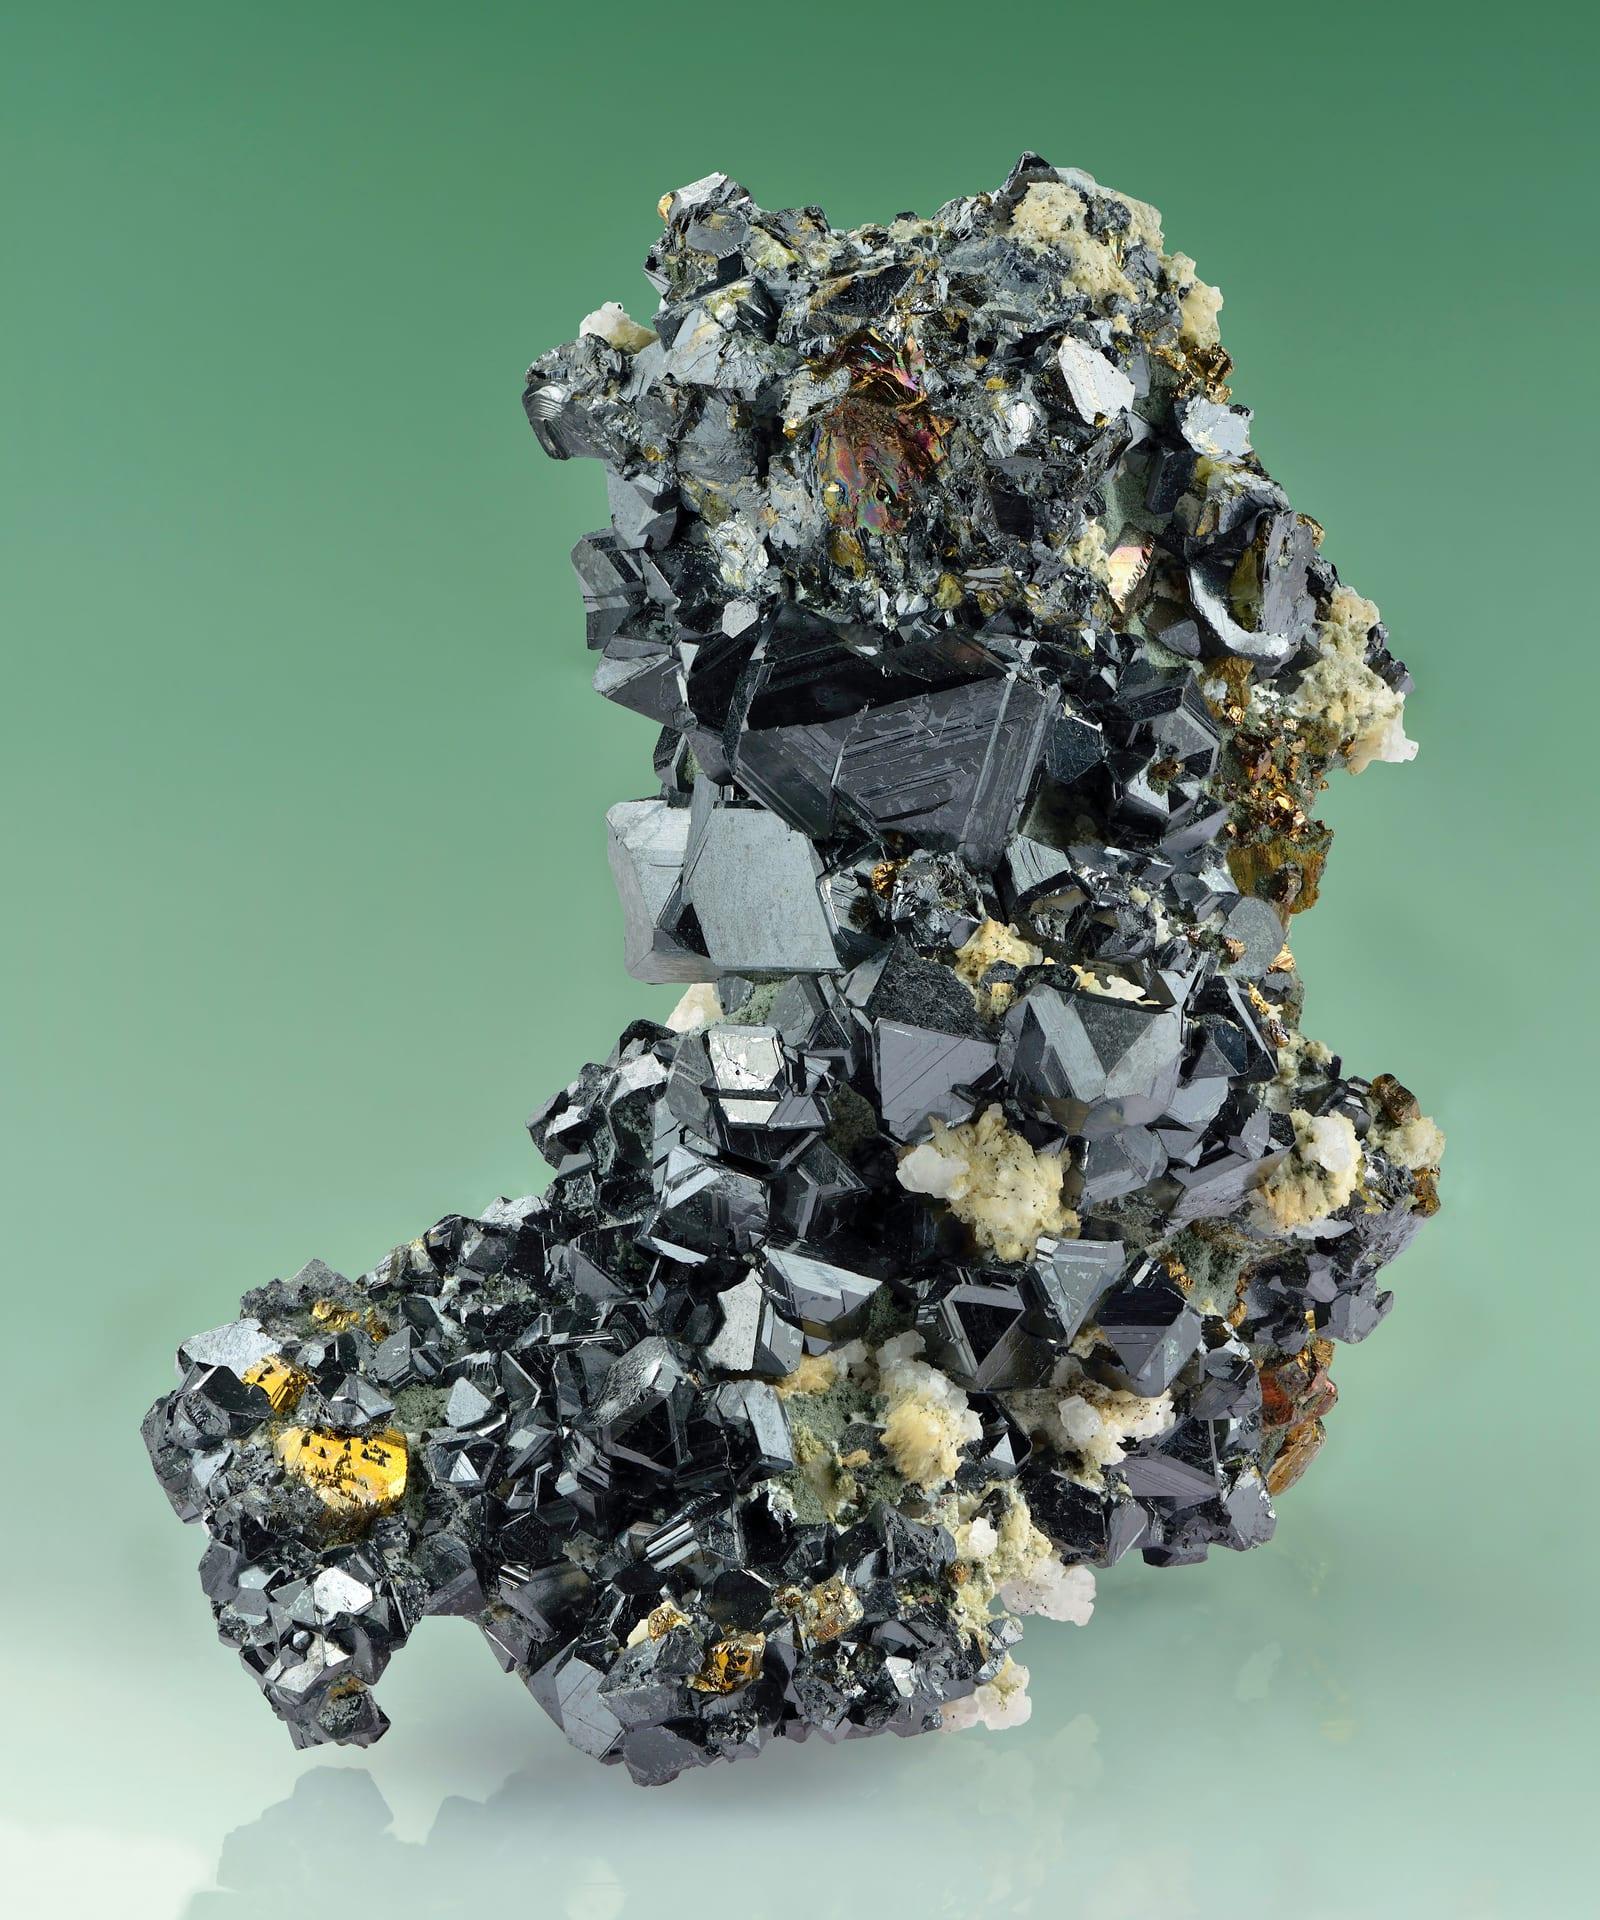 Sphaleritecommonmineral · Mohs 3.5-4yellow, brown, black
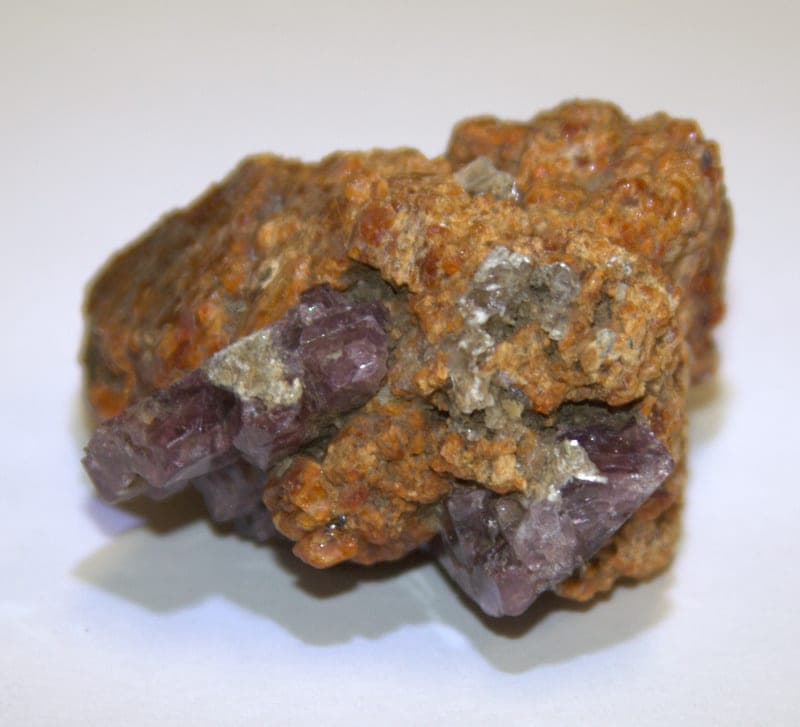 Spinelcommonmineral · Mohs 8red, blue, green
 Sputnik Aragonitecommonmineral · Mohs 3.5-4brown, tan, creamy white
 Staurolitecommonmineral · Mohs 7-7.5reddish-brown, brown, brownish-black
 Staurolite Crosscommonmineral · Mohs 7-7.5brown, reddish-brown, yellowish-brown
 Staurolite Schistcommonmetamorphic · Mohs 3.5-7dark brown, gray, brownish-black
 Stilbitecommonmineral · Mohs 3.5-4white, colorless, yellow
 Strontianitecommonmineral · Mohs 3.5colorless, white, gray
 Syenitecommonigneous · Mohs 6gray, pink, white
 Tabulate Coralcommonfossil · Mohs 5-7tan, brown, gray
 Teepee Canyon Agatecommonmineral · Mohs 6.5-7red, pink, white
 Thundereggscommonmineral · Mohs 6.5-7multicolored, brown, gray
 Tiger's Eyecommonmineral · Mohs 7golden-yellow, brown, reddish-brown
 Topazcommonmineral · Mohs 8yellow, brown, colorless
 Tourmalinated Quartzcommonmineral · Mohs 7colorless, white
 Tourmalinecommonmineral · Mohs 7-7.5black, green, pink
 Travertinecommonsedimentary · Mohs 3-4white, tan, cream
 Trilobitescommonfossilbrown, gray, black
 Tube Agatecommonmineral · Mohs 6.5-7white, gray, blue
 Tufacommonsedimentary · Mohs 3white, gray, yellow
 Turquoisecommonmineral · Mohs 5-6blue, blue-green, green
 Unakitecommonmetamorphic · Mohs 6-7green, pink, red
 Vesicular Basaltcommonigneous · Mohs 5-6black, dark gray, brownish-gray
 Vesuvianitecommonmineral · Mohs 6.5green, brown, yellow
 Welded Tuffcommonigneous · Mohs 3-6gray, tan, pink
 White Calcitecommonmineral · Mohs 3white, colorless
 White Opalcommongemstone · Mohs 5.5-6.5white, cream, off-white
 Wonderstonecommonsedimentary · Mohs 6.5-7red, yellow, brown
 Wonderstone Rhyolitecommonigneous · Mohs 5.5-6.5brown, tan, yellow
 Wood Opalcommonfossil · Mohs 5.5-6.5brown, tan, gray
 Yellow Jaspercommonmineral · Mohs 6.5-7yellow, mustard, ochre
 Yooperlitecommonmineral · Mohs 6gray, gray-brown
 Zoisitecommonmineral · Mohs 6-7gray, green, pink
Take the starter set to the field
RockHoundR shows mapped spots, what each one produces, and live land overlays so a beginner trip stays legal.
